In this tutorial, we are going to create a dedicated activity for the Navigation UI. As part of this, a NavigationView view will be added to the layout for rendering and visual purposes. We will just name this activity NavigationSampleActivity and the layout file ‘activity_navigation_sample’.
Inside of the layout file, add the following view to the xml.
This view is where the navigation UI and components will be attached and rendered.
Step 2: Initialize the NavigationView and some Stops
The NavigationView effectively brings the navigation experience and UI to the screen, attaching to the view we made above. In this example, it’s being set up in the activity’s OnCreate method.
First, add an instance of NavigationView as a class instance variable.
privateNavigationViewnavigationView;
privatevarnavigationView:NavigationView?=null
In preparation for the route calculation, create two stops—your origin and destination. (Typically, you would set the user’s current location as the first stop.)
// Create our origin point (most would use the user's current location)// Points are in longitude, latitude formatPointoriginPoint=Point.fromLngLat(-74.599677,40.361341);// Create our destinationPointdestinationPoint=Point.fromLngLat(-74.661750,40.309824);
// Create our origin point (most would use the user's current location)
// Points are in longitude, latitude format
valoriginPoint=Point.fromLngLat(-74.599677,40.361341)// Create our destination
valdestinationPoint=Point.fromLngLat(-74.661750,40.309824)
Besides adding the coordinates of the stops manually, you can retrieve the coordinates (latitude and longitude) of a location using geocoding. For more information on how to do this, refer to the Geocoding Example.
Next, it’s time to find the NavigationView from the layout file and do some initialization.
// Grab the NavigationView from the layout and put the instance state into the view's OnCreate()navigationView=(NavigationView)findViewById(R.id.navigation_view);navigationView.onCreate(savedInstanceState);/**
* Initialize the navigation view
* At this point you can also set the initial camera position of the navigation
* In this case, the origin point location can be used for our initial position
* The activity is being used for the onNavigationReadyCallback,
* so this activity needs to implement OnNavigationReadyCallback and the onNavigationReady function
*/navigationView.initialize(this,newCameraPosition.Builder().target(newLatLng(originPoint.latitude(),originPoint.longitude())).zoom(18).build());
// Grab the NavigationView from the layout and put the instance state into the view's OnCreate()
navigationView=findViewById<View>(R.id.navigation_view)asNavigationViewnavigationView!!.onCreate(savedInstanceState)/**
* Initialize the navigation view
* At this point you can also set the initial camera position of the navigation
* In this case, the origin point location can be used for our initial position
* The activity is being used for the onNavigationReadyCallback,
* so this activity needs to implement OnNavigationReadyCallback and the onNavigationReady function
*/navigationView!!.initialize(this,CameraPosition.Builder().target(LatLng(originPoint.latitude(),originPoint.longitude())).zoom(18.0).build())
If you use the code above, you will likely see an error with passing in this as the first parameter for navigationView.initialize(). In Step 3 of this tutorial, we will implement the onNavigationReadyCallback for this Activity. For the final step of this section, we will use the Point objects we created before to plan our trip.
/**
* We're going to create the trip, in this case we will build our trip stops using the
* coordinates we set earlier
*/// OriginTrimbleMapsTriptrimbleMapsTrip=TrimbleMapsTripProvider.create();trimbleMapsTrip.addStop(newTripStop(TrimbleMapsLocation.builder().coords(originPoint).build()));// DestinationtrimbleMapsTrip.addStop(newTripStop(TrimbleMapsLocation.builder().coords(destinationPoint).build()));trimbleMapsTrip.getOptions().setVoiceUnits(getUnitTypeForLocale(inferDeviceLocale(this)));
/**
* We're going to create the trip, in this case we will build our trip stops using the
* coordinates we set earlier
*/TrimbleMapsTripProvider.create().apply{// Origin
addStop(TripStop(TrimbleMapsLocation.builder().coords(originPoint).build()))// Destination
addStop(TripStop(TrimbleMapsLocation.builder().coords(destinationPoint).build()))options.apply{voiceUnits=inferDeviceLocale().getUnitTypeForLocale()}}
At this point, the NavigationView has been set up and you’ve planned your trip. Your code should look something like this:
import staticcom.trimblemaps.navigation.base.internal.extensions.ContextEx.inferDeviceLocale;import staticcom.trimblemaps.navigation.base.internal.extensions.LocaleEx.getUnitTypeForLocale;importandroid.os.Bundle;importandroidx.appcompat.app.AppCompatActivity;importandroidx.core.content.ContextCompat;importcom.trimblemaps.account.LicensedFeature;importcom.trimblemaps.account.TrimbleMapsAccountManager;importcom.trimblemaps.account.models.TrimbleMapsAccount;importcom.trimblemaps.android.core.permissions.PermissionsListener;importcom.trimblemaps.android.core.permissions.PermissionsManager;importcom.trimblemaps.api.geocoding.v1.models.TrimbleMapsLocation;importcom.trimblemaps.geojson.Point;importcom.trimblemaps.mapsdk.TrimbleMaps;importcom.trimblemaps.mapsdk.camera.CameraPosition;importcom.trimblemaps.mapsdk.geometry.LatLng;importcom.trimblemaps.navigation.core.TrimbleMapsNavigationProvider;importcom.trimblemaps.navigation.core.TrimbleMapsTrip;importcom.trimblemaps.navigation.core.TrimbleMapsTripProvider;importcom.trimblemaps.navigation.core.trip.model.TripStop;importcom.trimblemaps.navigation.ui.NavigationView;importcom.trimblemaps.navigation.ui.NavigationViewOptions;importcom.trimblemaps.navigation.ui.OnNavigationReadyCallback;importcom.trimblemaps.navigation.ui.listeners.NavigationListener;importorg.jetbrains.annotations.NotNull;importjava.util.List;importkotlin.collections.ArraysKt;importkotlin.jvm.internal.Intrinsics;publicclassNavigationSampleActivityextendsAppCompatActivityimplementsOnNavigationReadyCallback,NavigationListener{privateNavigationViewnavigationView;privatefinalPermissionsManagerpermissionsManager=newPermissionsManager(null);privatefinalPermissionsListenerpermissionsListener=newPermissionsListener(){@OverridepublicvoidonExplanationNeeded(List<String>permissionsToExplain){}@OverridepublicvoidonPermissionResult(booleangranted){if(granted&&PermissionsManager.isAndroidElevenPlus()&&!PermissionsManager.areLocationPermissionsGranted(NavigationSampleActivity.this)){permissionsManager.requestBackgroundLocationPermissions(NavigationSampleActivity.this);}}};@OverrideprotectedvoidonCreate(BundlesavedInstanceState){super.onCreate(savedInstanceState);TrimbleMapsAccountaccount=TrimbleMapsAccount.builder().apiKey("YOUR-API-KEY-HERE").addLicensedFeature(LicensedFeature.NAVIGATION_SDK).addLicensedFeature(LicensedFeature.MAPS_SDK).companyId("YOUR-COMPANY-ID-HERE").assetId("YOUR-ASSET-ID-HERE").product("CoPilot").build();TrimbleMapsAccountManager.initialize(account);TrimbleMapsAccountManager.awaitInitialization();TrimbleMaps.getInstance(this);if((!PermissionsManager.isAndroidElevenPlus()||ContextCompat.checkSelfPermission(this,android.Manifest.permission.ACCESS_BACKGROUND_LOCATION)!=0)&&ContextCompat.checkSelfPermission(this,android.Manifest.permission.ACCESS_FINE_LOCATION)!=0){this.permissionsManager.setListener(permissionsListener);this.permissionsManager.requestLocationPermissions(this);}else{}setContentView(R.layout.activity_navigation_sample);// Create our origin point (most would use the user's current location)// Points are in longitude, latitude formatPointoriginPoint=Point.fromLngLat(-74.599677,40.361341);// Create our destinationPointdestinationPoint=Point.fromLngLat(-74.661750,40.309824);// Grab the NavigationView from the layout and put the instance state into the view's OnCreate()navigationView=(NavigationView)findViewById(R.id.navigation_view);navigationView.onCreate(savedInstanceState);/**
* Initialize the navigation view
* At this point you can also set the initial camera position of the navigation
* In this case, the origin point location can be used for our initial position
* The activity is being used for the onNavigationReadyCallback,
* so this activity needs to implement OnNavigationReadyCallback and the onNavigationReady function
*/navigationView.initialize(this,newCameraPosition.Builder().target(newLatLng(originPoint.latitude(),originPoint.longitude())).zoom(18).build());/**
* We're going to create the trip, in this case we will build our trip stops using the
* coordinates we set earlier
*/// OriginTrimbleMapsTriptrimbleMapsTrip=TrimbleMapsTripProvider.create();trimbleMapsTrip.addStop(newTripStop(TrimbleMapsLocation.builder().coords(originPoint).build()));// DestinationtrimbleMapsTrip.addStop(newTripStop(TrimbleMapsLocation.builder().coords(destinationPoint).build()));trimbleMapsTrip.getOptions().setVoiceUnits(getUnitTypeForLocale(inferDeviceLocale(this)));}publicvoidonRequestPermissionsResult(intrequestCode,@NotNullString[]permissions,@NotNullint[]grantResults){Intrinsics.checkNotNullParameter(permissions,"permissions");Intrinsics.checkNotNullParameter(grantResults,"grantResults");super.onRequestPermissionsResult(requestCode,permissions,grantResults);if(PermissionsManager.isAndroidElevenPlus()){if(ArraysKt.contains(permissions,android.Manifest.permission.ACCESS_FINE_LOCATION)&&!PermissionsManager.areLocationPermissionsGranted(this)){permissionsManager.requestBackgroundLocationPermissions(this);}elseif(ArraysKt.contains(permissions,android.Manifest.permission.ACCESS_BACKGROUND_LOCATION)){}}elseif(permissions.length!=0&&ArraysKt.contains(permissions,android.Manifest.permission.ACCESS_FINE_LOCATION)){}}}
importandroid.os.Bundleimportandroid.view.Viewimportandroidx.appcompat.app.AppCompatActivityimportandroidx.core.content.ContextCompatimportcom.trimblemaps.account.LicensedFeatureimportcom.trimblemaps.account.TrimbleMapsAccountManagerimportcom.trimblemaps.account.models.TrimbleMapsAccountimportcom.trimblemaps.android.core.permissions.PermissionsListenerimportcom.trimblemaps.android.core.permissions.PermissionsManagerimportcom.trimblemaps.api.geocoding.v1.models.TrimbleMapsLocationimportcom.trimblemaps.geojson.Pointimportcom.trimblemaps.mapsdk.TrimbleMapsimportcom.trimblemaps.mapsdk.camera.CameraPositionimportcom.trimblemaps.mapsdk.geometry.LatLngimportcom.trimblemaps.navigation.base.internal.extensions.LocaleEx.getUnitTypeForLocaleimportcom.trimblemaps.navigation.base.internal.extensions.inferDeviceLocaleimportcom.trimblemaps.navigation.core.TrimbleMapsNavigationProviderimportcom.trimblemaps.navigation.core.TrimbleMapsTripProviderimportcom.trimblemaps.navigation.core.trip.model.TripStopimportcom.trimblemaps.navigation.ui.NavigationViewimportcom.trimblemaps.navigation.ui.NavigationViewOptionsimportcom.trimblemaps.navigation.ui.OnNavigationReadyCallbackimportcom.trimblemaps.navigation.ui.listeners.NavigationListenerclassNavigationSampleActivity:AppCompatActivity(),OnNavigationReadyCallback,NavigationListener{privatevarnavigationView:NavigationView?=nullprivatevalpermissionsManager=PermissionsManager(null)privatevalpermissionsListener=object:PermissionsListener{overridefunonExplanationNeeded(permissionsToExplain:MutableList<String>?){}overridefunonPermissionResult(granted:Boolean){if(granted&&PermissionsManager.isAndroidElevenPlus()&&!PermissionsManager.areLocationPermissionsGranted(this@NavigationSampleActivity)){permissionsManager.requestBackgroundLocationPermissions(this@NavigationSampleActivity)}}}overridefunonCreate(savedInstanceState:Bundle?){super.onCreate(savedInstanceState)valaccount=TrimbleMapsAccount.builder().apiKey("YOUR-API-KEY-HERE").addLicensedFeature(LicensedFeature.NAVIGATION_SDK).addLicensedFeature(LicensedFeature.MAPS_SDK).companyId("YOUR-COMPANY-ID-HERE").assetId("YOUR-ASSET-ID-HERE").product("CoPilot").build()TrimbleMapsAccountManager.initialize(account)TrimbleMapsAccountManager.awaitInitialization()TrimbleMaps.getInstance(this)if((PermissionsManager.isAndroidElevenPlus()&&ContextCompat.checkSelfPermission(this,android.Manifest.permission.ACCESS_BACKGROUND_LOCATION)==0)||ContextCompat.checkSelfPermission(this,android.Manifest.permission.ACCESS_FINE_LOCATION)==0){}else{permissionsManager.listener=permissionsListenerpermissionsManager.requestLocationPermissions(this)}setContentView(R.layout.activity_navigation_sample)// Create our origin point (most would use the user's current location)
// Points are in longitude, latitude format
valoriginPoint=Point.fromLngLat(-74.599677,40.361341)// Create our destination
valdestinationPoint=Point.fromLngLat(-74.661750,40.309824)// Grab the NavigationView from the layout and put the instance state into the view's OnCreate()
navigationView=findViewById<View>(R.id.navigation_view)asNavigationViewnavigationView!!.onCreate(savedInstanceState)/**
* Initialize the navigation view
* At this point you can also set the initial camera position of the navigation
* In this case, the origin point location can be used for our initial position
* The activity is being used for the onNavigationReadyCallback,
* so this activity needs to implement OnNavigationReadyCallback and the onNavigationReady function
*/navigationView!!.initialize(this,CameraPosition.Builder().target(LatLng(originPoint.latitude(),originPoint.longitude())).zoom(18.0).build())/**
* We're going to create the trip, in this case we will build our trip stops using the
* coordinates we set earlier
*/TrimbleMapsTripProvider.create().apply{// Origin
addStop(TripStop(TrimbleMapsLocation.builder().coords(originPoint).build()))// Destination
addStop(TripStop(TrimbleMapsLocation.builder().coords(destinationPoint).build()))options.apply{voiceUnits=inferDeviceLocale().getUnitTypeForLocale()}}}overridefunonRequestPermissionsResult(requestCode:Int,permissions:Array<String>,grantResults:IntArray){super.onRequestPermissionsResult(requestCode,permissions,grantResults);permissionsManager.onRequestPermissionsResult(requestCode,permissions,grantResults)if(PermissionsManager.isAndroidElevenPlus()){if(permissions.isNotEmpty()&&permissions.contains(android.Manifest.permission.ACCESS_BACKGROUND_LOCATION)){}}elseif(permissions.isNotEmpty()&&permissions.contains(android.Manifest.permission.ACCESS_FINE_LOCATION)){}}}
Next, we will need to implement some methods.
Step 3: Implementing onNavigationReadyCallback and NavigationListener
In the previous section, you will have likely received an error in your code when trying to pass this into navigationView.initialize(). To resolve this error, you’ll need to implement the OnNavigationReadyCallback in your activity. In this section, we also want to implement the NavigationListener for the activity. This will be used later.
Typically an IDE like Android Studio will help you import the methods you need into your Activity to meet the implemented classes requirements. You can also add the below yourself:
With the methods implemented, it’s time to actually start navigation. This can be done from within the onNavigationReady method that was implemented earlier.
@OverridepublicvoidonNavigationReady(booleanisRunning){/**
* We need to create some navigation view options.
* We can retrieve the trip we made earlier from the trip provider and pass that in
* Additionally, we will use this activity for the navigation listener meaning we will need
* to implement the NavigationListener class and it's required functions
*/NavigationViewOptionsnavigationViewOptions=NavigationViewOptions.builder(this).trip(TrimbleMapsTripProvider.retrieve()).navigationListener(this).build();// Start the navigationnavigationView.startNavigation(navigationViewOptions);}
overridefunonNavigationReady(isRunning:Boolean){/**
* We need to create some navigation view options.
* We can retrieve the trip we made earlier from the trip provider and pass that in
* Additionally, we will use this activity for the navigation listener meaning we will need
* to implement the NavigationListener class and it's required functions
*/valnavigationViewOptions=NavigationViewOptions.builder(this).trip(TrimbleMapsTripProvider.retrieve()).navigationListener(this).shouldSimulateRoute(true).build()// Start the navigation
navigationView!!.startNavigation(navigationViewOptions)}
The code above creates the options we’ll be passing into the navigation. Most importantly, the trip we created earlier with the provider is retrieved and passed in. We also set the NavigationListener to this, which were the other methods implemented previously. Finally, navigation starts.
Before running the code in Simulator, make sure to setup the theme as below in values/themes.xml.
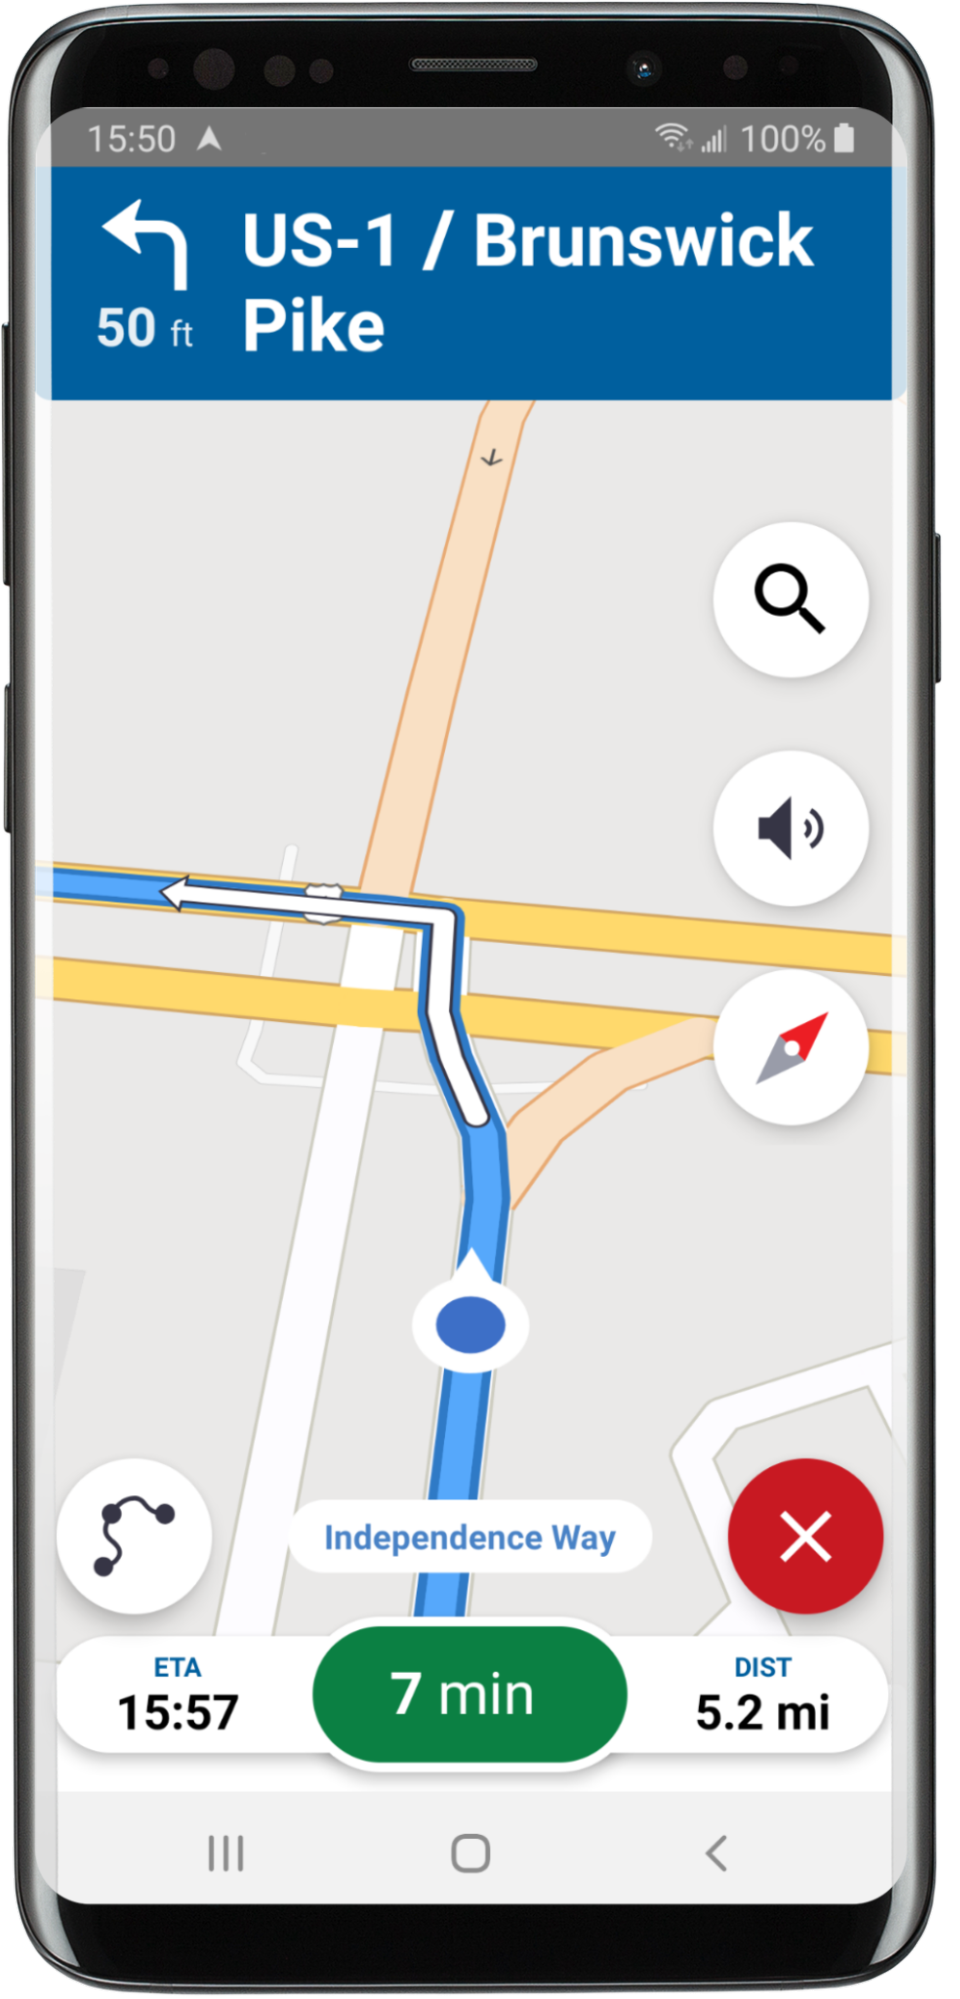
At this point, we now have an app with embedded navigation taking the user from A to B.
Step 5: Set behavior when navigation is canceled
The user is now navigating to their destination, but there’s one other small piece that can be added—controlling what happens when navigation is canceled.
Should the user press the end navigation button , this will trigger the onCancelNavigation() method that was implemented earlier. Here, code can be added to stop navigation and kill the current activity.
@OverridepublicvoidonCancelNavigation(){// Fired when navigation is cancelednavigationView.stopNavigation();TrimbleMapsNavigationProvider.destroy();finish();}
overridefunonCancelNavigation(){// Fired when navigation is canceled
navigationView!!.stopNavigation()TrimbleMapsNavigationProvider.destroy()finish()}
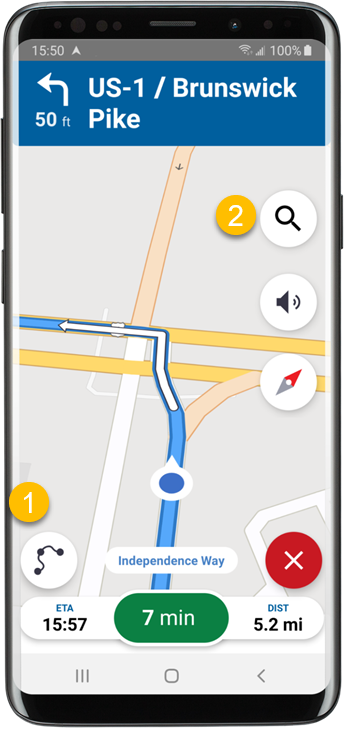
Step 6: Activate the trip preview and search screen buttons
Trip preview and location search buttons are displayed by default on the navigation screen. The following code demonstrates how to activate them.
Trip preview (1) and location search (2) buttons
Trip preview
/** We can set custom behavior in the onCreate for the navigation screen's trip preview button
* to bring the user to the current trip's trip preview.
* isNavigating is used to differentiate behavior while on the route and default behavior.
* This button can also be hidden using navigationView.hideTripPreviewButton()
*/navigationView.retrieveTripPreviewBtn().setOnClickListener{valintent=Intent(this,TripPreviewActivity::class.java)intent.putExtra("isNavigating",true)startActivity(intent)}// Trip Preview XML
<?xmlversion="1.0"encoding="utf-8"?><androidx.constraintlayout.widget.ConstraintLayoutxmlns:android="http://schemas.android.com/apk/res/android"xmlns:app="http://schemas.android.com/apk/res-auto"xmlns:tools="http://schemas.android.com/tools"android:layout_width="match_parent"android:layout_height="match_parent"tools:context=".TripPreviewActivity"><com.trimblemaps.navigation.ui.components.trippreview.TripPreviewScreenandroid:id="@+id/trip_preview_screen"android:layout_width="match_parent"android:layout_height="match_parent"app:trimblemaps_uiCompass="false"/></androidx.constraintlayout.widget.ConstraintLayout>// Trip Preview
importandroid.content.Intentimportandroid.location.Locationimportandroidx.appcompat.app.AppCompatActivityimportandroid.os.Bundleimportcom.trimblemaps.api.directions.v1.models.DirectionsResponseimportcom.trimblemaps.api.directions.v1.models.RouteOptionsimportcom.trimblemaps.api.geocoding.v1.models.TrimbleMapsLocationimportcom.trimblemaps.api.poi.v1.models.PoisResponseimportcom.trimblemaps.geojson.Pointimportcom.trimblemaps.mapsdk.geometry.LatLngimportcom.trimblemaps.mapsdk.plugins.route.RouteRequestCallbackimportcom.trimblemaps.navigation.base.internal.extensions.LocaleEx.getUnitTypeForLocaleimportcom.trimblemaps.navigation.base.internal.extensions.inferDeviceLocaleimportcom.trimblemaps.navigation.core.TrimbleMapsTripimportcom.trimblemaps.navigation.core.TrimbleMapsTripProviderimportcom.trimblemaps.navigation.core.trip.model.TripStopimportcom.trimblemaps.navigation.core.trip.model.toTripStopimportcom.trimblemaps.navigation.plugins.poisonroute.ui.PoisOnRouteCallbackimportcom.trimblemaps.navigation.ui.components.trippreview.*// Databinding from the XML
importcom.your_app_name.databinding.ActivityTripPreviewBindingclassTripPreviewActivity:AppCompatActivity(){privatelateinitvartripPreview:TripPreviewScreenprivatevarisNavigating=falsecompanionobject{vardirectionsResponse:DirectionsResponse?=null}privatelateinitvarbinding:ActivityTripPreviewBindingoverridefunonCreate(savedInstanceState:Bundle?){super.onCreate(savedInstanceState)binding=ActivityTripPreviewBinding.inflate(layoutInflater)valview=binding.rootsetContentView(view)isNavigating=intent.getBooleanExtra("isNavigating",false)initViews()tripPreview.onCreate(savedInstanceState)tripPreview.setPoisOnRouteCallback(object: PoisOnRouteCallback{overridefunonResponse(response:PoisResponse?){}overridefunonFailure(throwable:Throwable?){}})vallocations=intent.getSerializableExtra("locations")as?ArrayList<TrimbleMapsLocation>if(locations!=null&&!TrimbleMapsTripProvider.isActive()){TrimbleMapsTripProvider.create().apply{locations.forEach{stop->addStop(stop.toTripStop())}options.apply{language=inferDeviceLocale().toString()voiceUnits=inferDeviceLocale().getUnitTypeForLocale()alternatives=false}}}if(tripPreview.trip==null)tripPreview.trip=TrimbleMapsTripProvider.retrieve()}publicoverridefunonResume(){super.onResume()tripPreview.onResume()}publicoverridefunonPause(){super.onPause()tripPreview.onPause()}overridefunonStart(){super.onStart()tripPreview.onStart()}overridefunonStop(){super.onStop()tripPreview.onStop()}overridefunonLowMemory(){super.onLowMemory()tripPreview.onLowMemory()}overridefunonDestroy(){super.onDestroy()// tripPreview may not be initialized if the Activity was restarted but the OS process had been
// killed/restarted and we redirected to LaunchActivity
if(::tripPreview.isInitialized){tripPreview.onDestroy()}}overridefunonSaveInstanceState(outState:Bundle){super.onSaveInstanceState(outState)}overridefunonRestoreInstanceState(savedInstanceState:Bundle){super.onRestoreInstanceState(savedInstanceState)}privatefuninitViews(){tripPreview=findViewById(R.id.trip_preview_screen)tripPreview.routeRequestCallback=routeRequestCallbacktripPreview.setCallbackListeners(directionsCallback)tripPreview.startButtonCallback=startCallbacktripPreview.stopListChangedCallback=stopsListChangedCallbacktripPreview.backButtonCallback=tripPreviewCallback}privatevalrouteRequestCallback=object: RouteRequestCallback{overridefunonRouteReady(route:DirectionsResponse?){}overridefunonRequestFailure(throwable:Throwable,routeOptions:RouteOptions){}}/**
* User changed the stops list
*/privatevalstopsListChangedCallback=object: OnStopsListChangedCallback{overridefunaddStop(stop:TripStop){}overridefundeleteStop(index:Int){}overridefunmoveStop(from:Int,to:Int){}overridefuninsertStop(stop:TripStop,atIndex:Int){}}privatevaldirectionsCallback=object:OnTripPreviewSummarySheetDirectionsButtonCallback{overridefunonTripPreviewSummarySheetDirectionsButtonPressed(){}}privatevalstartCallback=object:TripPreviewScreen.StartButtonListener{overridefunonStartButtonPressed(trip:TrimbleMapsTrip?,isChanged:Boolean){if(isChanged&&trip!=null)TrimbleMapsTripProvider.retrieve().updateTrip(trip)if(!isNavigating){valintent=Intent(this@TripPreviewActivity,NavigationActivity::class.java)// Can't send this in an Intent as it is too large, just put it somewhere
// where NavigationActivity can get it
directionsResponse=tripPreview.directionsstartActivity(intent)}finish()}}privatevaltripPreviewCallback=object:OnExitTripPreviewCallback{overridefunonExit(trip:TrimbleMapsTrip?,isChanged:Boolean){if(isChanged&&trip!=null)TrimbleMapsTripProvider.retrieve().updateTrip(trip)// If we aren't navigating, we need to return to the search screen
if(!isNavigating){valintent=Intent(this@TripPreviewActivity,SearchActivity::class.java)startActivity(intent)}finish()}}}// Extensions to other classes
funLocation.toPoint():Point=Point.fromLngLat(this.longitude,this.latitude)funTripStop.toPoint():Point=Point.fromLngLat(this.trimbleMapsLocation.coords().lon().toDouble(),this.trimbleMapsLocation.coords().lat().toDouble())funLatLng.toPoint():Point=Point.fromLngLat(this.longitude,this.latitude)
Search
/** We can set custom behavior in the onCreate for the navigation screen's search button
* to bring the user to the search screen.
* This allows the user to search for POIs along the route
* isNavigating is used to differentiate behavior while on the route and default behavior.
* This button can also be hidden using navigationView.hideSearchButton()
*/navigationView.retrieveSearchBtn().setOnClickListener{valintent=Intent(this,PoiActivity::class.java)intent.putExtra("isNavigating",true)startActivity(intent)}// PoiActivity XML
<?xmlversion="1.0"encoding="utf-8"?><androidx.constraintlayout.widget.ConstraintLayoutxmlns:android="http://schemas.android.com/apk/res/android"xmlns:app="http://schemas.android.com/apk/res-auto"xmlns:tools="http://schemas.android.com/tools"android:layout_width="match_parent"android:layout_height="match_parent"tools:context=".SearchActivity"><androidx.fragment.app.FragmentContainerViewandroid:id="@+id/searchFragment"android:layout_width="match_parent"android:layout_height="match_parent"app:layout_constraintBottom_toBottomOf="parent"app:layout_constraintEnd_toEndOf="parent"app:layout_constraintStart_toStartOf="parent"app:layout_constraintTop_toTopOf="parent"/></androidx.constraintlayout.widget.ConstraintLayout>// PoiActivity
importandroid.annotation.SuppressLintimportandroid.content.Intentimportandroid.location.Locationimportandroid.os.Bundleimportandroidx.appcompat.app.AppCompatActivityimportandroidx.fragment.app.FragmentTransactionimportandroidx.fragment.app.commitimportcom.microsoft.appcenter.crashes.Crashesimportcom.trimblemaps.api.geocoding.v1.models.TrimbleMapsLocationimportcom.trimblemaps.mapsdk.camera.CameraUpdateFactoryimportcom.trimblemaps.mapsdk.location.modes.CameraModeimportcom.trimblemaps.mapsdk.location.modes.RenderModeimportcom.trimblemaps.mapsdk.maps.Styleimportcom.trimblemaps.mapsdk.plugins.places.autocomplete.model.PlaceOptionsimportcom.trimblemaps.mapsdk.plugins.places.autocomplete.ui.PlaceSelectionListenerimportcom.trimblemaps.navigation.plugins.poisonroute.model.PoisOnRouteOptionsimportcom.trimblemaps.navigation.plugins.poisonroute.ui.PoisOnRouteFragmentimportcom.trimblemaps.mapsdk.style.layers.PropertyFactory.*importcom.trimblemaps.android.core.permissions.PermissionsManagerimportcom.trimblemaps.api.poi.v1.models.PoisResponseimportcom.trimblemaps.mapsdk.location.LocationComponentActivationOptionsimportcom.trimblemaps.mapsdk.plugins.places.searchflow.ui.SearchFlowFragmentimportcom.trimblemaps.navigation.core.TrimbleMapsNavigationimportcom.trimblemaps.navigation.core.TrimbleMapsNavigationProviderimportcom.trimblemaps.navigation.core.TrimbleMapsTripimportcom.trimblemaps.navigation.core.TrimbleMapsTripProviderimportcom.trimblemaps.navigation.core.trip.model.TripStopimportcom.trimblemaps.navigation.core.trip.model.toTripStopimportcom.trimblemaps.navigation.plugins.poisonroute.ui.PoisOnRouteCallbackimportjava.security.AccessController.getContext// Databinding from the XML
importcom.your_app_name.databinding.ActivitySearchBindingclassPoiActivity:AppCompatActivity(){privatevarcurrentLocation:Location?=nullprivatevalplaceOptions=PlaceOptions.builder().viewMode(PlaceOptions.MODE_FLOATING).historyCount(0)// Don't show recents
.hideMenuIcon(true).includeTrimblePlaceIds(true).useCustomPlaces(true)lateinitvarfragment:PoisOnRouteFragmentlateinitvartrip:TrimbleMapsTriplateinitvartrimbleMapsNavigation:TrimbleMapsNavigationprivatelateinitvarbinding:ActivitySearchBindingoverridefunonCreate(savedInstanceState:Bundle?){super.onCreate(savedInstanceState)binding=ActivitySearchBinding.inflate(layoutInflater)valview=binding.rootsetContentView(view)trip=TrimbleMapsTripProvider.retrieve()trimbleMapsNavigation=TrimbleMapsNavigationProvider.retrieve()if(savedInstanceState==null){initSearch()}else{fragment=supportFragmentManager.findFragmentByTag(PoisOnRouteFragment.TAG)asPoisOnRouteFragmentfragment.setOnPlaceSelectedListener(placeSelectionListener)fragment.setOnStyleLoadedListener(onStyleLoadedCallback)}}@SuppressLint("MissingPermission")privatevalonStyleLoadedCallback=Style.OnStyleLoaded{style->fragment.map?.apply{moveCamera(CameraUpdateFactory.zoomTo(14.0))}if(PermissionsManager.isForegroundLocationPermissionsGranted(this)){fragment.map?.locationComponent?.apply{// Activate with options
activateLocationComponent(LocationComponentActivationOptions.builder(this@PoiActivity,style).build())// Enable to make component visible
isLocationComponentEnabled=truecameraMode=CameraMode.TRACKING_GPS_NORTHrenderMode=RenderMode.COMPASS}}}privatefuninitSearch(){currentLocation=trip.lastRawLocationcurrentLocation?.let{placeOptions.center(it.toPoint())}valoptions:PoisOnRouteOptions=PoisOnRouteOptions.builder().viewMode(PoisOnRouteOptions.MODE_FULLSCREEN).placeOptions(placeOptions.build()).routeOptions(trip.remainingTripRouteOptions()).tripId(trimbleMapsNavigation.getRouteUUID()).geometryIndex(trimbleMapsNavigation.getRouteProgress()?.currentLegProgress?.geometryIndex).legIndex(trimbleMapsNavigation.getRouteProgress()?.currentLegProgress?.legIndex).maxDistanceAhead(trimbleMapsNavigation.getRouteProgress()?.currentLegProgress?.distanceRemaining?.toDouble()).directions(trimbleMapsNavigation.getRoutes()).build()fragment=PoisOnRouteFragment.newInstance(options)fragment.setOnPlaceSelectedListener(placeSelectionListener)fragment.setOnStyleLoadedListener(onStyleLoadedCallback)fragment.setPoisOnRouteCallback(object: PoisOnRouteCallback{overridefunonResponse(response:PoisResponse?){}overridefunonFailure(throwable:Throwable?){}})supportFragmentManager.commit{setReorderingAllowed(true)add(binding.searchFragment.id,fragment,PoisOnRouteFragment.TAG)setTransition(FragmentTransaction.TRANSIT_FRAGMENT_FADE)}}privatevalplaceSelectionListener=object: PlaceSelectionListener{overridefunonPlaceSelected(feature:TrimbleMapsLocation){updateRouteWithStop(feature)supportFragmentManager.beginTransaction().remove(fragment).commit()}overridefunonCancel(){supportFragmentManager.beginTransaction().remove(fragment).commit()finish()}}privatefunupdateRouteWithStop(location:TrimbleMapsLocation){// Insert this stop into the trip
// First, find the next open (not completed) stop
valnextOpenStop=trip.nextOpenStop// Figure out the stop index for that stop
valstopIndex=trip.stops.indexOf(nextOpenStop)if(stopIndex<=0){trip.addStop(location.toTripStop())}else{trip.insertStop(location.toTripStop(),stopIndex)}finish()}}
Full code for all steps
publicclassNavigationSampleActivityextendsAppCompatActivityimplementsOnNavigationReadyCallback,NavigationListener{privateNavigationViewnavigationView;privatefinalPermissionsManagerpermissionsManager=newPermissionsManager(null);privatefinalPermissionsListenerpermissionsListener=newPermissionsListener(){@OverridepublicvoidonExplanationNeeded(List<String>permissionsToExplain){}@OverridepublicvoidonPermissionResult(booleangranted){if(granted&&PermissionsManager.isAndroidElevenPlus()&&!PermissionsManager.areLocationPermissionsGranted(NavigationSampleActivity.this)){permissionsManager.requestBackgroundLocationPermissions(NavigationSampleActivity.this);}}};@OverrideprotectedvoidonCreate(BundlesavedInstanceState){super.onCreate(savedInstanceState);TrimbleMapsAccountaccount=TrimbleMapsAccount.builder().apiKey("YOUR-API-KEY-HERE").addLicensedFeature(LicensedFeature.NAVIGATION_SDK).addLicensedFeature(LicensedFeature.MAPS_SDK).companyId("YOUR-COMPANY-ID-HERE").assetId("YOUR-ASSET-ID-HERE").product("CoPilot").build();TrimbleMapsAccountManager.initialize(account);TrimbleMapsAccountManager.awaitInitialization();TrimbleMaps.getInstance(this);if((!PermissionsManager.isAndroidElevenPlus()||ContextCompat.checkSelfPermission(this,android.Manifest.permission.ACCESS_BACKGROUND_LOCATION)!=0)&&ContextCompat.checkSelfPermission(this,android.Manifest.permission.ACCESS_FINE_LOCATION)!=0){this.permissionsManager.setListener(permissionsListener);this.permissionsManager.requestLocationPermissions(this);}else{}setContentView(R.layout.activity_navigation_sample);// Create our origin point (most would use the user's current location)// Points are in longitude, latitude formatPointoriginPoint=Point.fromLngLat(-74.599677,40.361341);// Create our destinationPointdestinationPoint=Point.fromLngLat(-74.661750,40.309824);// Grab the NavigationView from the layout and put the instance state into the view's OnCreate()navigationView=(NavigationView)findViewById(R.id.navigation_view);navigationView.onCreate(savedInstanceState);/**
* Initialize the navigation view
* At this point you can also set the initial camera position of the navigation
* In this case, the origin point location can be used for our initial position
* The activity is being used for the onNavigationReadyCallback,
* so this activity needs to implement OnNavigationReadyCallback and the onNavigationReady function
*/navigationView.initialize(this,newCameraPosition.Builder().target(newLatLng(originPoint.latitude(),originPoint.longitude())).zoom(18).build());/**
* We're going to create the trip, in this case we will build our trip stops using the
* coordinates we set earlier
*/// OriginTrimbleMapsTriptrimbleMapsTrip=TrimbleMapsTripProvider.create();trimbleMapsTrip.addStop(newTripStop(TrimbleMapsLocation.builder().coords(originPoint).build()));// DestinationtrimbleMapsTrip.addStop(newTripStop(TrimbleMapsLocation.builder().coords(destinationPoint).build()));trimbleMapsTrip.getOptions().setVoiceUnits(getUnitTypeForLocale(inferDeviceLocale(this)));}publicvoidonRequestPermissionsResult(intrequestCode,@NotNullString[]permissions,@NotNullint[]grantResults){Intrinsics.checkNotNullParameter(permissions,"permissions");Intrinsics.checkNotNullParameter(grantResults,"grantResults");super.onRequestPermissionsResult(requestCode,permissions,grantResults);if(PermissionsManager.isAndroidElevenPlus()){if(ArraysKt.contains(permissions,android.Manifest.permission.ACCESS_FINE_LOCATION)&&!PermissionsManager.areLocationPermissionsGranted(this)){permissionsManager.requestBackgroundLocationPermissions(this);}elseif(ArraysKt.contains(permissions,android.Manifest.permission.ACCESS_BACKGROUND_LOCATION)){}}elseif(permissions.length!=0&&ArraysKt.contains(permissions,android.Manifest.permission.ACCESS_FINE_LOCATION)){}}/**
* Callbacks and overrides
*/@OverridepublicvoidonNavigationReady(booleanisRunning){/**
* We need to create some navigation view options.
* We can retrieve the trip we made earlier from the trip provider and pass that in
* Additionally, we will use this activity for the navigation listener meaning we will need
* to implement the NavigationListener class and it's required functions
*/NavigationViewOptionsnavigationViewOptions=NavigationViewOptions.builder(this).trip(TrimbleMapsTripProvider.retrieve()).navigationListener(this).shouldSimulateRoute(true).build();// Start the navigationnavigationView.startNavigation(navigationViewOptions);}@OverridepublicvoidonCancelNavigation(){// Fired when navigation is cancelednavigationView.stopNavigation();TrimbleMapsNavigationProvider.destroy();finish();}@OverridepublicvoidonNavigationFinished(){}@OverridepublicvoidonNavigationRunning(){}/**
* Activity Overrides
*/@OverridepublicvoidonLowMemory(){super.onLowMemory();navigationView.onLowMemory();}@OverridepublicvoidonStart(){super.onStart();navigationView.onStart();}@OverridepublicvoidonResume(){super.onResume();navigationView.onResume();}@OverridepublicvoidonStop(){super.onStop();navigationView.onStop();}@OverridepublicvoidonPause(){super.onPause();navigationView.onPause();}@OverridepublicvoidonDestroy(){navigationView.onDestroy();super.onDestroy();}@OverridepublicvoidonSaveInstanceState(BundleoutState){navigationView.onSaveInstanceState(outState);super.onSaveInstanceState(outState);}@OverridepublicvoidonRestoreInstanceState(BundlesavedInstanceState){super.onRestoreInstanceState(savedInstanceState);navigationView.onRestoreInstanceState(savedInstanceState);}}
classNavigationSampleActivity:AppCompatActivity(),OnNavigationReadyCallback,NavigationListener{privatevarnavigationView:NavigationView?=nullprivatevalpermissionsManager=PermissionsManager(null)privatevalpermissionsListener=object:PermissionsListener{overridefunonExplanationNeeded(permissionsToExplain:MutableList<String>?){}overridefunonPermissionResult(granted:Boolean){if(granted&&PermissionsManager.isAndroidElevenPlus()&&!PermissionsManager.areLocationPermissionsGranted(this@NavigationSampleActivity)){permissionsManager.requestBackgroundLocationPermissions(this@NavigationSampleActivity)}}}overridefunonCreate(savedInstanceState:Bundle?){super.onCreate(savedInstanceState)valaccount=TrimbleMapsAccount.builder().apiKey("YOUR-API-KEY-HERE").addLicensedFeature(LicensedFeature.NAVIGATION_SDK).addLicensedFeature(LicensedFeature.MAPS_SDK).companyId("YOUR-COMPANY-ID-HERE").assetId("YOUR-ASSET-ID-HERE").product("CoPilot").build()TrimbleMapsAccountManager.initialize(account)TrimbleMapsAccountManager.awaitInitialization()TrimbleMaps.getInstance(this)if((PermissionsManager.isAndroidElevenPlus()&&ContextCompat.checkSelfPermission(this,android.Manifest.permission.ACCESS_BACKGROUND_LOCATION)==0)||ContextCompat.checkSelfPermission(this,android.Manifest.permission.ACCESS_FINE_LOCATION)==0){}else{permissionsManager.listener=permissionsListenerpermissionsManager.requestLocationPermissions(this)}setContentView(R.layout.activity_navigation_sample)// Create our origin point (most would use the user's current location)
// Points are in longitude, latitude format
valoriginPoint=Point.fromLngLat(-74.599677,40.361341)// Create our destination
valdestinationPoint=Point.fromLngLat(-74.661750,40.309824)// Grab the NavigationView from the layout and put the instance state into the view's OnCreate()
navigationView=findViewById<View>(R.id.navigation_view)asNavigationViewnavigationView!!.onCreate(savedInstanceState)/**
* Initialize the navigation view
* At this point you can also set the initial camera position of the navigation
* In this case, the origin point location can be used for our initial position
* The activity is being used for the onNavigationReadyCallback,
* so this activity needs to implement OnNavigationReadyCallback and the onNavigationReady function
*/navigationView!!.initialize(this,CameraPosition.Builder().target(LatLng(originPoint.latitude(),originPoint.longitude())).zoom(18.0).build())/**
* We're going to create the trip, in this case we will build our trip stops using the
* coordinates we set earlier
*/TrimbleMapsTripProvider.create().apply{// Origin
addStop(TripStop(TrimbleMapsLocation.builder().coords(originPoint).build()))// Destination
addStop(TripStop(TrimbleMapsLocation.builder().coords(destinationPoint).build()))options.apply{voiceUnits=inferDeviceLocale().getUnitTypeForLocale()}}}overridefunonRequestPermissionsResult(requestCode:Int,permissions:Array<String>,grantResults:IntArray){super.onRequestPermissionsResult(requestCode,permissions,grantResults);permissionsManager.onRequestPermissionsResult(requestCode,permissions,grantResults)if(PermissionsManager.isAndroidElevenPlus()){if(permissions.isNotEmpty()&&permissions.contains(android.Manifest.permission.ACCESS_BACKGROUND_LOCATION)){}}elseif(permissions.isNotEmpty()&&permissions.contains(android.Manifest.permission.ACCESS_FINE_LOCATION)){}}/**
* Callbacks and overrides
*/overridefunonNavigationReady(isRunning:Boolean){/**
* We need to create some navigation view options.
* We can retrieve the trip we made earlier from the trip provider and pass that in
* Additionally, we will use this activity for the navigation listener meaning we will need
* to implement the NavigationListener class and it's required functions
*/valnavigationViewOptions=NavigationViewOptions.builder(this).trip(TrimbleMapsTripProvider.retrieve()).navigationListener(this).shouldSimulateRoute(true).build()// Start the navigation
navigationView!!.startNavigation(navigationViewOptions)}overridefunonCancelNavigation(){// Fired when navigation is canceled
navigationView!!.stopNavigation()TrimbleMapsNavigationProvider.destroy()finish()}overridefunonNavigationFinished(){}overridefunonNavigationRunning(){}/**
* Activity Overrides
*/overridefunonLowMemory(){super.onLowMemory()navigationView!!.onLowMemory()}publicoverridefunonStart(){super.onStart()navigationView!!.onStart()}publicoverridefunonResume(){super.onResume()navigationView!!.onResume()}publicoverridefunonStop(){super.onStop()navigationView!!.onStop()}publicoverridefunonPause(){super.onPause()navigationView!!.onPause()}publicoverridefunonDestroy(){navigationView!!.onDestroy()super.onDestroy()}publicoverridefunonSaveInstanceState(outState:Bundle){navigationView!!.onSaveInstanceState(outState)super.onSaveInstanceState(outState)}publicoverridefunonRestoreInstanceState(savedInstanceState:Bundle){super.onRestoreInstanceState(savedInstanceState)navigationView!!.onRestoreInstanceState(savedInstanceState)}}