Standalone App Integration
Contents
This document takes you through the steps necessary to integrate the standalone CoPilot app into a workflow to provide voice-guided, turn-by-turn navigation for commercial vehicles. It is intended for:
- Telematics partners who are offering CoPilot as an add-on to their existing solution. (Often through their own private app store or marketplace.)
- Trimble Maps direct customers who have purchased CoPilot licenses and are adding it to an existing solution.
Cloud-Based Tasks
Step 1: Add Vehicles, Vehicle Groups, Drivers, and Driver Groups to Account Manager
Account Manager is a web tool that allows CoPilot customers to remotely manage CoPilot settings such as Vehicle Routing Profiles, Configuration Profiles, Route Modifiers, and synchronized custom Place sets. Settings are assigned by Vehicle Group or Driver Group.
This ensures consistency in operations for similar groups of vehicles, while allowing for flexibility in behavior by vehicle type (e.g. Heavy Duty vs. Light Duty routing profiles) or business division (e.g. different Route Modifier sets for local vs. long-distance drivers). Additional web tools functionality such as route compliance reporting (our RouteReporter web tool) and map feedback (our MapSure web tool) tie into these vehicle and driver groupings.
- A direct customer, or a partner on a customer’s behalf, can use Trimble Maps Web Services APIs to populate Account Manager with vehicles, drivers, and groups.
- For those choosing a non-integrated approach, customer admins can directly populate Account Manager via its user interface, individually or through bulk uploads.
Step 2: Add Assets to Account Manager
Account Manager also allows CoPilot customers to manage the assignment of CoPilot licenses to Assets—vehicles, mobile devices, or drivers. The features and functionality exposed in CoPilot are then based on which asset is being logged in, and what is included in the associated license. CoPilot will not run without a licensed asset.
Note: Partners should choose a single Asset type to use across all their customers for a simpler integration.
- If vehicles or drivers are being used as the assets in Account Manager, then the integration will automatically populate the Account Manager asset list for that account—no additional work is required.
- A direct customer, or a partner on a customer’s behalf, can use Trimble Maps Web Services APIs to populate Account Manager with assets.
- For those choosing a non-integrated approach, customer admins can directly populate Account Manager with assets via its user interface, individually or through bulk uploads.
Step 3: Dispatch Trips to CoPilot
With this functionality, CoPilot customers can take manual address entry out of a driver’s hands, and instead push dispatched stops and trips automatically into CoPilot through either:
- A cloud-based API. The trip is built in the cloud for a specific Vehicle and Driver, and then delivered to the CoPilot device associated with that Vehicle and Driver. A direct customer, or a partner on a customer’s behalf, can send trip information directly to Trimble Maps Trip Management APIs, which generate the trip and sends it to CoPilot. In order to receive trips via Trip Management, CoPilot requires the following configuration setting:
[TripManagement]
BackOfficeTripIntegrationEnabled = 1
- A URL launch command. A single stop or multiple stops on a trip can be sent to CoPilot via URL.
Step 4: (Optional) Increase Account Management Controls
Partners wanting to maintain direct control of end customer account creation and license count changes can do so through a suite of optional Web Services APIs. This can be extended to control license assignment to individual Assets within individual customer accounts.
- A partner can manage its end customer’s accounts and license counts through Trimble Maps Web Services APIs.
- A direct customer, or a partner on a customer’s behalf, can use Trimble Maps Web Services APIs to directly assign or unassign licenses to and from particular Assets.
Mobile Device Tasks
Step 1: Install CoPilot on the Mobile Device
The CoPilot application needs to first be installed on the mobile device. There are a few options that are often used in combination across a partner’s customers:
- The end customer can leverage the Play or iTunes app stores’ standard mechanism for downloading the CoPilot application. This is the most flexible approach, and we suggest leaving on the Android or iOS configuration to automatically apply app updates, which simplifies future upgrades.
- End customers who prefer greater control of the software on their devices can leverage their MDM (Mobile Device Management) solution provider to distribute the CoPilot APK, which is available for download from the Play store. In this case, the automatic app update configuration should be turned off.
- Partners with their own software distribution solutions may choose to distribute the CoPilot APK on behalf of their customers, but should consider what value is being added and at what cost in overhead versus simply leveraging the Play store mechanism.
Important iOS Note: When first downloading and installing the 10.19 App Store version of CoPilot on your iOS devices, you must allow Push Notifications in order to send trips to CoPilot using the Trip Management service. Without Push Notifications, a driver will not receive a popup message in CoPilot that they have a new trip available. These notifications can later be turned off on the device, if necessary, in Settings > Notifications > CoPilot.
Step 2: Send the Single URL Launch Command
We recommend the partner’s mobile application use a single, consolidated URL launch command to automate login to CoPilot and pass any optional configurations. Both Android and iOS operating systems require the application on the receiving end of a URL launch command to be presented in the user interface for security reasons. As such, limiting the frequency of URL launch calls avoids unnecessarily interrupting the user.
This consolidated URL launch command should be sent whenever the Vehicle, Driver, and/or licensed Asset changes, for example on driver login, or when a driver switches vehicles.
Step 2a: Header
Every URL launch command sent to CoPilot should start with the following header:
copilot://options?type=CONFIG
Step 2b: Identify the Asset for the Licensing Check
The Account Manager web tool is used by customers to assign licenses to their Assets (Vehicle, Driver, or Device). Access to CoPilot is based on identification of which customer account and Asset will be using that instance of CoPilot. CoPilot then checks whether a license is assigned to that Asset in Account Manager and exposes features according to that associated license.
Partners
Partners automating the CoPilot login process for their customers can identify the customer account using a combination of Partner ID and External Account ID (the ID the partner assigned to that customer). Asset ID is then defined.
The additional URL launch piece for licensing as a partner is:
&PartnerID=sample-partner&ExternalAccountID=partner-defined.account.id&AssetID=partner-defined.asset.id
A first time launch of CoPilot on a device using URL commands (no sound)
| Parameter | Definition |
|---|---|
PartnerID
| The partner identifier assigned by Trimble Maps. |
ExternalAccountID
| The partner’s existing account identifier for their customer who is deploying CoPilot. |
AssetID
| The identifier for the asset to which a license is assigned in the Account Manager. (Often, but not always, a vehicle ID) |
Direct Trimble Maps Customers
A direct customer can simplify the CoPilot login process by using just their Trimble Maps CompanyID plus the AssetID.
The additional URL launch piece for licensing as a direct customer is:
&CompanyID=trimble-defined.customer.id&AssetID=customer-defined.asset.id
| Parameter | Definition |
|---|---|
CompanyID
| The customer account identifier assigned by Trimble Maps. |
AssetID
| The identifier for the asset to which a license is assigned in the Account Manager. (Often, but not always, a vehicle ID) |
Step 2c: Identify the Vehicle and Driver for Configuration, Reporting, and Dispatched Trip Delivery
Each instance of CoPilot needs to know which Vehicle or Driver is using it at any given time. CoPilot will update its settings according to the configuration in Account Manager for the vehicle or driver associated with that instance of CoPilot. CoPilot also uses this vehicle and driver identification to populate reports in the various web tools, including add-on RouteReporter compliance reporting and for tagging driver feedback in the MapSure web tool.
In addition, the dispatched trip integration functions by matching the vehicle or driver in the dispatched trip with the vehicle or driver associated with a particular instance of CoPilot. It then sends the trip and any later updates to that instance of CoPilot.
It is therefore critically important to communicate vehicle and driver changes to CoPilot as they occur, including at login / logout.
The additional URL launch piece for Vehicle and Driver identification is:
&VehicleID=partner-defined.vehicle.id&DriverID=partner-defined.driver.id
| Parameter | Definition |
|---|---|
VehicleID
| The identifier for the vehicle as defined by the partner or direct customer. |
DriverID
| The identifier for the driver as defined by the partner or direct customer. |
Step 2d: (Optional) Add a Button to Return to Your App
Through the same URL launch command, it is possible to add a button to the CoPilot screen that a driver can tap to send CoPilot to the background and return to your mobile app. That format is:
&EnableCustomButton=true&AppLaunchBundleID=bundle.id.of.application
| Parameter | Definition |
|---|---|
EnableCustomButton
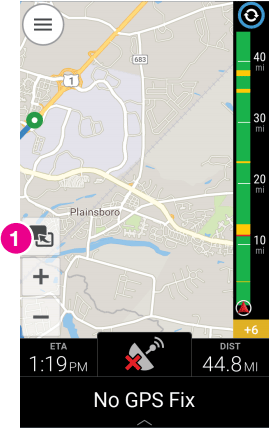
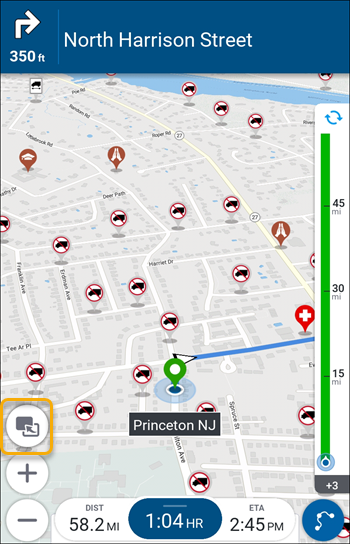
| Set to “true” to enable the “return to partner app” button as shown below. |
AppLaunchBundleID
| The bundle ID of the mobile application you wish to return the user to. |


Step 2e: (Optional) Apply Advanced Configuration Changes
It is possible to send additional configurations through the single URL launch command, though the majority of integrations should not need this advanced functionality. If you are interested in using advanced configurations, please speak with a Trimble Maps Sales Engineer for support to ensure a successful implementation.
Sample Consolidated URL Launch Command
To accomplish configuration Steps 2a-2d above, a single URL call for a partner named “Telematics Company” using vehicle-based licensing might look like:
copilot://options?type=CONFIG&PartnerID=TelematicsCompanyID&ExternalAccountID=11111&AssetID=Truck123&VehicleID=Truck123&DriverID=Jdoe01&EnableCustomButton=true&AppLaunchBundleID=Com.example.TelematicsCompanyApp
| Parameter | Definition | Sample Value in URL Example Above |
|---|---|---|
PartnerID
| ID assigned by Trimble Maps | TelematicsCompanyID |
ExternalAccountID
| Telematics Company’s account ID for the customer | 11111 |
AssetID
| The identifier for the asset to which a license is assigned in Account Manager. This often will match the vehicle ID. | Truck123 |
VehicleID
| Telematics Company’s vehicle ID | Truck123 |
DriverID
| Telematics Company’s driver ID | Jdoe01 |
EnableCustomButton
| Set to true to enable | true |
AppLaunchBundleID
| Bundle ID for Telematics Company’s mobile app | Com.example.TelematicsCompanyApp |