Map Styles
Contents
Using the Custom Styles Library, you can start with one of our carefully crafted styles and customize it for your use case or business.
Please note that Custom Styles can only be used with Maps SDK 3.5 and Later
Creating a new Map Style
Start by selecting the Create First Map Style button on the Map Styles Library landing page.

Choose one of our included styles and select the Edit a Copy button. This style will be the starting point for your new style.

Once you have selected the stylistic starting point, you can preview the out-of-the-box style. Enter a name for your new style and select Make a Copy to continue.

Using your custom style in a map
Once you have named your style, it is ready to use in a map. Select Publish, and you will be presented with some sample code to get you started. You likely want to make adjustments, and you have two options:
- Select Customize to use our Customizer. This powerful tool allows you to quickly make some of the most common adjustments.
- For maximum control, select Advanced Edit. The advanced editor takes a little more time to learn to use but may be necessary for some custom styles.

Customizing a Style
The Customizer allows you to adjust the style by applying changes to entire groups of map layers. You can change visibility and color for all Admin Labels, for example, without having to edit each of the Admin Label layers. You can also change fonts and icons. All of this requires very little working knowledge of map styling or map technology. This is the fastest way to get to a professional and attractive custom style.
Layers
To show or hide a group of layers, select the visibility (eye) icon next to the layer group name.

You can also adjust the base color for a layer group using the color picker.

For more precise adjustments, you can use the Hue, Saturation, and Lightness controls. The tool provides buttons for either small or large increases or decreases to each of these values.

Please be aware these controls apply a relative adjustment to all of the colors in the impacted layers. To change the color of a particular attribute in a specific layer, use the Advanced Editor.
Adding Layers
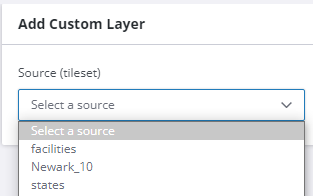
In addition to customizing the color and visibility of an existing layer, the Customizer allows you to add a new Layer to display a custom Tileset from your Tileset Library. select Add Custom Layer, and select the Tileset source.
Select the layer type most appropriate for the source. Specify a position in the layer stack by indicating that your new layer will be below labels, roads, or everything. Specify the line attributes and select Add Layer.
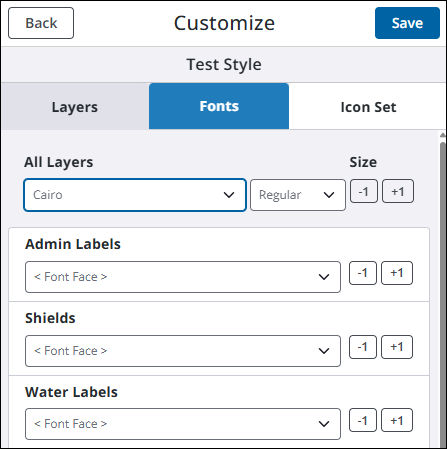
Fonts
Select the Fonts tab to change the font and font size for All Layers or for specific layers. As you change the font, it changes on the map display so you can see how it will appear on your maps.
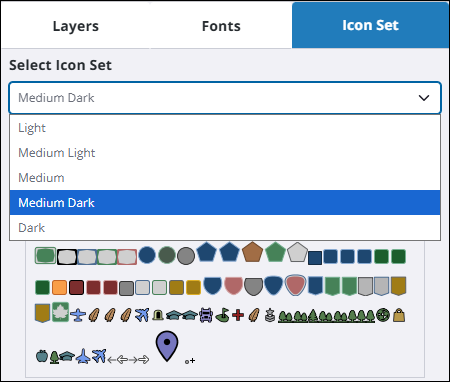
Icon Set
Select the Icon Set tab to change the coloring of icons such as road labels and POI pins. As you change the icon set, it changes on the map display so you can see how it will appear on your maps.
Advanced Editor
Selecting Advanced Edit from the Style Preview page will take you to the Advanced Editor. While the Customizer is meant to make common style adjustments easy, the Advanced Editor allows full control of your style.

At the top of the Advanced Editor you have some general controls: Close, Save, Undo and Redo.

Below the general controls you will see a list of all the layers with a duplicate button and a visibility toggle.

Clicking on any layer will open the Properties panel. This panel allows you to see and edit the properties of the layer. For more details on what each property means/does check out the Style Specification Features Guide.

In addition to allowing you to edit any of the layers currently in the style, the Advanced Edit feature also allows you to add new layers. The layer ID for the new layer can only contain letters, numbers, hyphens, and underscores and must be unique.

Each layer must specify a source. You can select a source from the base sources or you can source the data for your layer from one of your Tilesets.
